Who doesn’t love a beautifully crafted bow? Whether it's for wrapping gifts, decorating your home, or adding a touch of charm to a wreath, bows are timeless accessories. Making one yourself is easier than you might think, and the best part is that you get to customize it to your liking. With just a few tools and some ribbon, you can create something unique and personal. In this article, we’ll explore how to make a bow with ribbon, step by step, so you can add flair to any project.
Bows are not just functional; they’re a way to express creativity and personality. Whether you're creating a simple flat bow or a more intricate pompom, the process is simple and fun. Plus, it’s a great way to save money by avoiding store-bought options. Once you get the hang of it, you’ll be tying bows like a pro in no time!
So, if you're looking to add a little pizzazz to your life, this guide will show you everything you need to know to make a bow with ribbon. From choosing the right ribbon to putting the finishing touches, let’s get started!
Table of Contents
- How Much Ribbon Do You Need to Make a Bow with Ribbon?
- What Type of Ribbon Should You Use to Make a Bow?
- Can You Make a Bow with Wired Ribbon?
- How to Attach Your Ribbon Bow?
- Simple Steps to Make a Bow with Ribbon
- What Tools Do You Need to Make a Bow with Ribbon?
- Tips for Making Perfect Ribbon Bows
- Final Thoughts on Making Bows
How Much Ribbon Do You Need to Make a Bow with Ribbon?
One of the first things you need to think about when making a bow is how much ribbon you’ll need. The amount depends on the size and style of bow you're aiming for. For smaller bows, you can use ribbon that's 1 inch or less in width. These are great for crafts or hair accessories. On the other hand, if you're making a larger bow for a wreath or a gift, thicker ribbon tends to work better.
So, how long should your ribbon be? For a 5-inch wide bow, you’ll need about 16 inches of ribbon. But don’t worry too much about being exact. Sometimes, it’s all about trial and error, and you might find that slightly more or less ribbon works better for your design. Just a little extra ribbon can give you room to play around with the loops and tails.
What Type of Ribbon Should You Use to Make a Bow?
Choosing the right ribbon can make a big difference in how your bow turns out. Satin ribbon is a popular choice because it holds its shape well and has a shiny finish. Burlap ribbon, on the other hand, gives a more rustic feel. Wired ribbon is also a great option if you want your bow to stay in place without drooping.
Really, the choice is up to you. You might prefer something smooth and sleek or something textured and earthy. It's all about matching the ribbon to the project. For example, if you're decorating a Christmas wreath, you might lean toward a shiny ribbon to catch the light. If you're adding a bow to a rustic-themed gift, burlap might be more fitting.
Can You Make a Bow with Wired Ribbon?
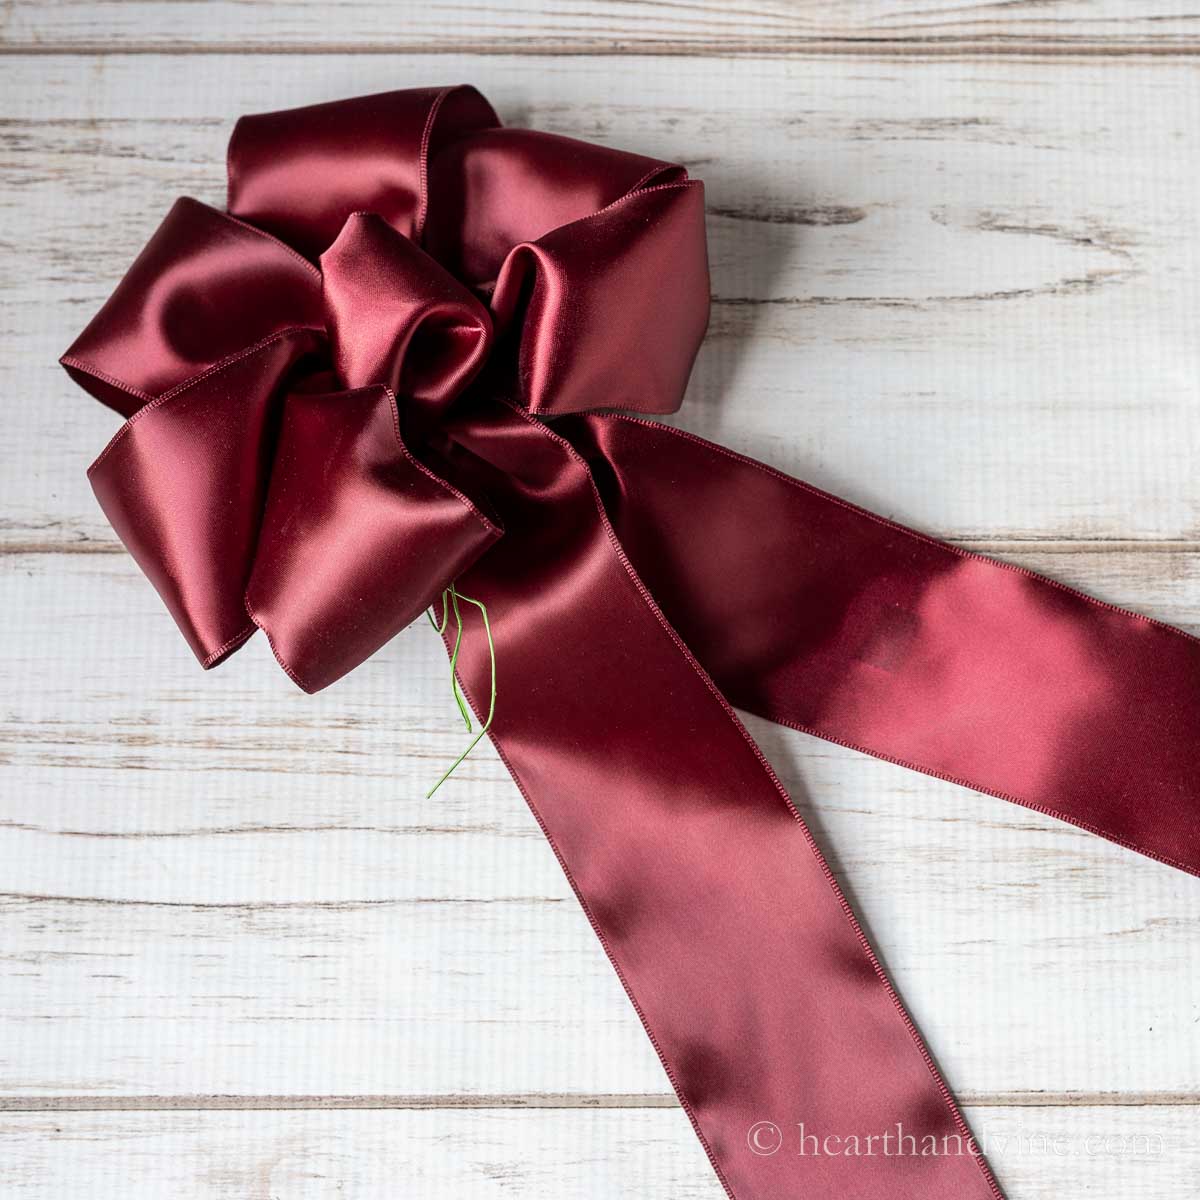
Wired ribbon is a bit different from regular ribbon, but it's incredibly useful for making bows that need to hold their shape. If you're making a bow for a wreath or a decoration that will be on display for a while, wired ribbon is definitely worth considering. The wire helps the loops stay exactly where you want them, giving your bow a polished look.
When using wired ribbon, start by measuring out about 24 inches. Fold it back and forth to create loops, keeping the center tightly held as you go. It’s a bit like folding a fan. Once you’ve made all your loops, tie a piece of string or floral wire around the middle to secure it. You can then adjust the loops and tails to get the look you want.
How to Attach Your Ribbon Bow?
Attaching your bow is an important step, and there are several ways to do it depending on what you're attaching it to. If you're fixing it to a wreath or a tree, you might want to leave the ends of the chenille stems exposed so they can be used to secure the bow. Alternatively, you can use a long trail of ribbon to tie it in place, covering up the chenille stems.
For gifts, you might prefer to glue the bow onto the wrapping paper. This is particularly useful if you want the bow to stay perfectly centered. Just a little dab of glue on the back should do the trick. If you're attaching it to a craft project, you might use a hot glue gun or even sew it on if the material allows.
Simple Steps to Make a Bow with Ribbon
Now that you’ve got your ribbon and tools ready, let’s walk through the steps to make a bow. Start by finding the center of your ribbon. This is where you’ll eventually tie it together. Make two loops to either side, ensuring the good side of the ribbon is facing up. Keep folding until you have the number of loops you want.
Once you’ve created all your loops, gather them tightly in the center. Use a piece of floral wire, thread, or even a small piece of ribbon to tie everything together. You can then shape the loops and cut the tails to your desired length. It’s a good idea to seal the ends of synthetic ribbons with a lighter or match to prevent fraying.
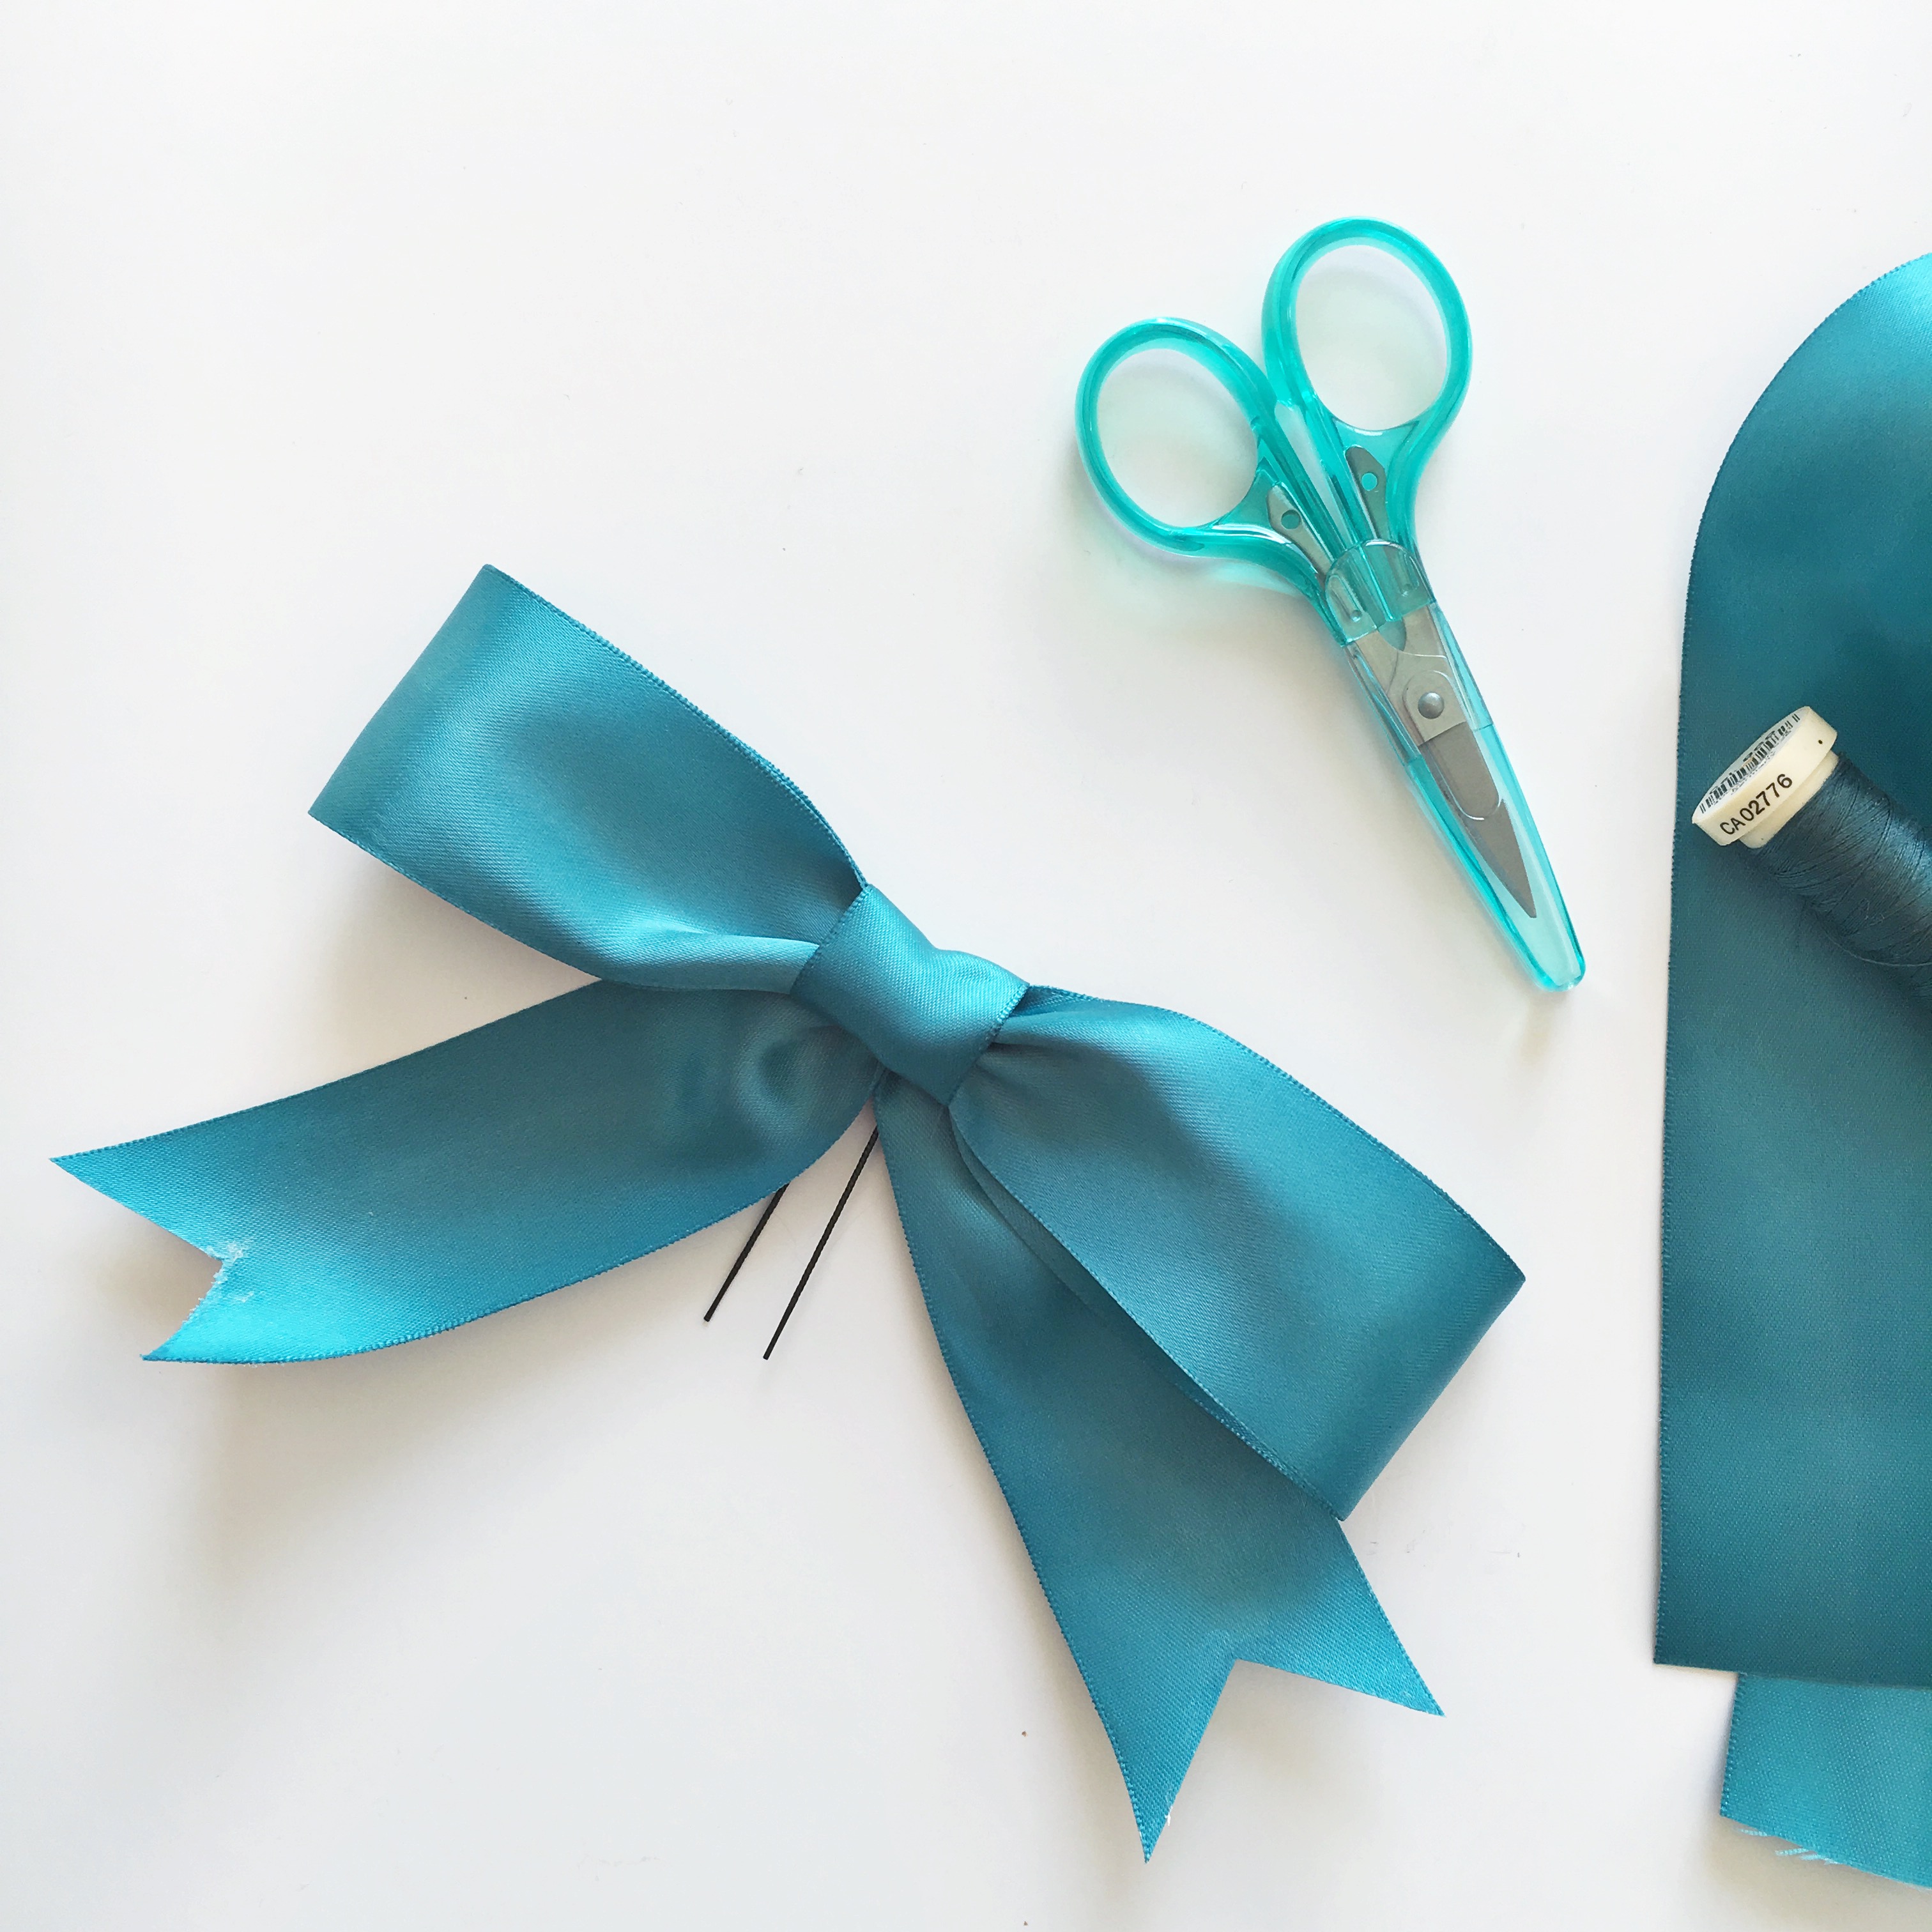
What Tools Do You Need to Make a Bow with Ribbon?
Believe it or not, you don’t need much to make a bow. All you really need is a piece of ribbon and a pair of scissors. Of course, if you’re using wired ribbon, you might also want some chenille stems or floral wire to hold everything together. A lighter or match is handy for sealing synthetic ribbon ends.
For more advanced bows, you might consider using a hot glue gun or even a sewing machine if you’re attaching the bow to fabric. But for most basic bows, scissors and ribbon are all you need. It’s a project that’s simple enough for beginners but also allows for plenty of creativity.
Tips for Making Perfect Ribbon Bows
Here are a few tips to help you make bows that look fantastic every time. First, don’t be afraid to experiment with different types of ribbon. Each material will behave slightly differently, so trying out a few options can help you find what works best for you.
Second, pay attention to the size of your loops and tails. They should be proportional to the overall size of the bow. If you’re making a large bow, larger loops and tails will look better. For smaller bows, keep everything proportionate to avoid looking out of balance.
Finally, don’t rush the process. Take your time shaping the loops and adjusting the tails. A well-made bow is often the result of patience and attention to detail. It’s okay if your first few attempts aren’t perfect. Practice makes perfect, and soon you’ll be creating bows that look like they came straight from a store.
Final Thoughts on Making Bows
Making bows with ribbon is a fun and rewarding activity that anyone can enjoy. Whether you're wrapping gifts, decorating your home, or adding a personal touch to a craft project, knowing how to make a bow is a skill that comes in handy. With just a little practice, you'll be able to create bows that are both beautiful and functional.
Remember, the key is to have fun and let your creativity shine. Don’t be afraid to try new things and experiment with different types of ribbon and techniques. Before you know it, you’ll be making bows that are uniquely yours, adding a personal touch to everything you do. So grab your ribbon and scissors and get started today!

Detail Author:
- Name : Prof. Edwina Purdy
- Username : ashley82
- Email : layla.hansen@hotmail.com
- Birthdate : 1994-08-12
- Address : 54298 Dickens Locks North Jorge, PA 73058
- Phone : +1-320-616-8713
- Company : Kunde Ltd
- Job : Philosophy and Religion Teacher
- Bio : Velit molestiae dolores veritatis illum hic. Sit pariatur aut animi modi. Maxime tempora veniam qui facilis.
Socials
instagram:
- url : https://instagram.com/prowe
- username : prowe
- bio : Dignissimos ut voluptas iste sapiente. Nobis aut aperiam qui iure.
- followers : 6494
- following : 1117
tiktok:
- url : https://tiktok.com/@rowep
- username : rowep
- bio : Ullam sed nulla aut. Dolor id nam ex laboriosam.
- followers : 949
- following : 1257
facebook:
- url : https://facebook.com/rowep
- username : rowep
- bio : Et ipsum reprehenderit non quae ullam. Quo aut accusamus ea quod rerum qui.
- followers : 6098
- following : 1825
linkedin:
- url : https://linkedin.com/in/perry8343
- username : perry8343
- bio : Quibusdam et ipsam ex sunt.
- followers : 879
- following : 2912
